
CLAMSHELL : bookmaking

Clamshell box workshops
THERE'S A SURPRISE INSIDE every clamshell box when made to fit something special. Like its giant saltwater clam namesake, this type of box is firmly hinged along one side, and the remaining edges seal snugly together.
You can see a variety of clamshells we’ve made at the bottom of this page.
Dive in
WHILE CLAMSHELLS CAN BE labor intensive (lots of parts with lots of measuring, cutting, and gluing), they also deliver a huge, matching satisfaction factor when finished. Whether you're an artist, collector, crafter, or book lover, or you've just been gifted with something special that needs protection (like a family bible or a collection of family photos), you can sink your teeth into this workshop.
Workshop content
Showcase of examples and production stages
Discussion of archival protection and material sources
Handout of instructions for reference
Step-by-step, hands-on box construction
Tips for accurate measuring of materials
Use of board shear and craft knife
Gluing and trimming tools and techniques
Handcrafting of smooth surfaces and tight corners
You should walk out with a finished clamshell and a nicely satisfying "I-made-this" feeling.
LEAD GRAFFITI OFFERS 2 VERSIONS of the clamshell box workshop. We help you understand the concepts behind box making so you’re ready to take on more challenging boxes. Plus, taking our workshop offers access to our workspace, tools, equipment, and guidance when needed.
Wear comfortable shoes and work clothing. Dress for the weather: we are not air-conditioned and in winter much of the heat rises to the top of our 20-foot ceiling. Bring questions, your camera, and a notebook to record your process.
Basic Clamshell Workshop
THE ESSENTIAL CLAMSHELL WORKSHOP (image at the top) uses pre-cut materials and takes you step-by-step through the basic assembly of a small single-wall box. Demonstrations of the measuring and cutting processes are included. This makes it easier to concentrate on the actual construction. You'll appreciate our streamlined process for this structure, plus step-by-step physical samples of each stage for you to have a look at. Photos and descriptions below take you through the major steps of this workshop.
up to 8 people, age 15 and better;
$150 each;
5 to 6 working hours plus lunch;
all tools and materials provided
See our current workshop calendar, or email us to request a date.
Custom Clamshell Workshop
IN THE CUSTOM CLAMSHELL WORKSHOP, you supply an object (such as a family Bible or photo album) for which you will then measure and cut all materials needed for the box. We are happy to supply the book board, and you can select from the book cloth and papers we have on hand. OR, for a custom look, you can bring your own book cloth and decorative papers (we’re happy to provide materials guidance). This workshop can accommodate a maximum of 4 participants and may require an extra 2 hours, depending on the participants. The size of your object’s LONGEST LENGTH + 2 TIMES THE SHORTEST LENGTH must be less than 30” and less than 4” THICK.
up to 4 people, age 15 and better;
$200 each;
6 to 8 working hours plus lunch;
all tools and materials are provided, or bring your own
See out current workshop calendar, or email us to request a date.
REMEMBER, taking either of these workshops gives you access to Lead Graffiti’s tools, equipment, guidance and workspace for your own future handcrafted boxes. Immediately below are photos and descriptions of the majority of the steps to build and wrap a simple clamshell box. At the bottom of this page you will see a number of clamshells made by Lead Graffiti.
STEPS FOR A SINGLE-WALL CLAMSHELL BOX

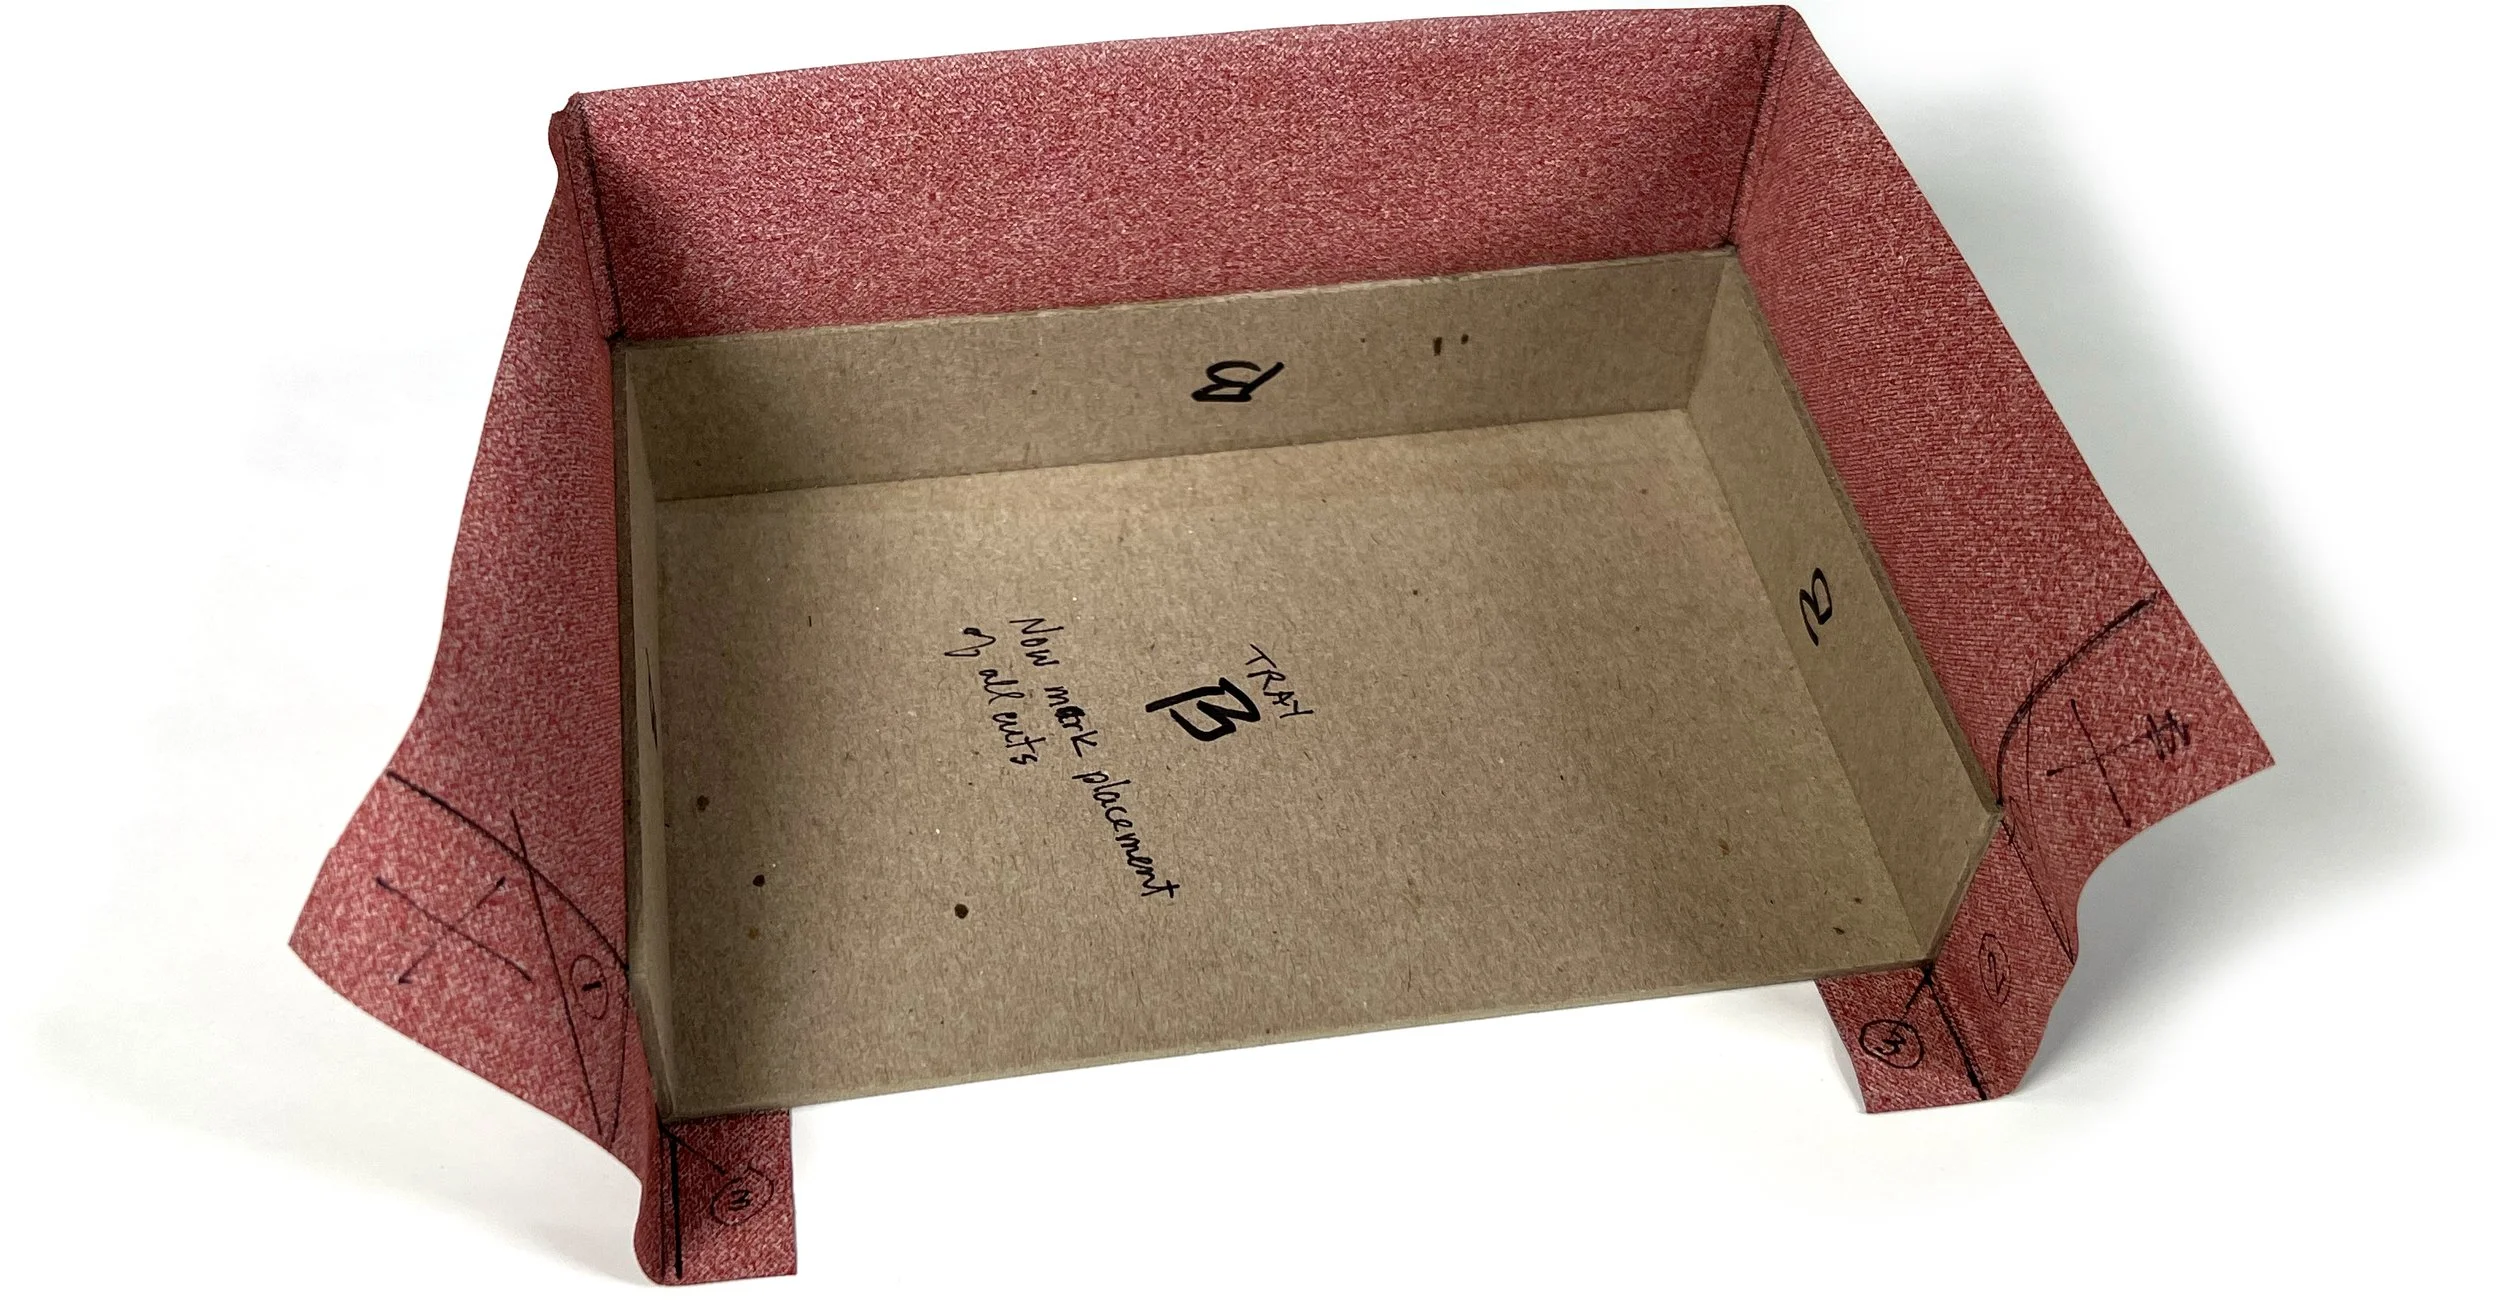
THE PHOTO ABOVE shows the small inner tray that is assembled first. The typical single-wall clamshell box has these 3 major components:
a small inner tray that snugly holds the item in place,
a slightly larger outer tray that snugly encloses the small inner tray, and
an outer cover with a spine that both hinges and binds the 2 trays in position.
⬆ STEP 1 : TRAY ASSEMBLY Four pieces of book board are needed for each tray: 1 floor, 2 end walls (same size), and 1 foredge wall. Starting with the fore-edge wall, the walls are glued on the top surface of the floor. A board shear is used to cut the book board because it makes the cut edges of the boards perfectly square, and thus the walls are very vertical once they are glued in place.
Length, width, and height measurements of the small inner tray are used to cut the 4 pieces of book board needed to build the larger outer tray for a snug fit. The assembly of the floor and walls for both trays is the same. NOTE : the long closed side of both trays faces the foredge. The long open side of both trays faces the spine of the finished box.
We use cake decorating bottles with tiny tips (filled with PVA glue instead of icing) for precise control of glue on the book board edges.

⬆ STEP 2 : WRAPPING THE TRAYS In the photo above, a cut-to-measure strip of book cloth has been glued to 2 of the outer walls of a tray. Once all 3 outer walls are covered, turn-ins are folded under the floor bottom, and excess cloth is trimmed at the corners and glued underneath the outer edges of the bottom of the floor. REPEAT these steps for the other tray.
⬆ STEP 3 : PREPARING TO CUT Mark all your cuts at the inside corners and the series of cuts that will be made at the 2 ends of the walls facing the spine. The object here is to cut away any excess cloth while ensuring that all exposed edges of the floor and walls will be covered with bookcloth. We have small plastic triangles that make this part of the job easier. REPEAT these steps for the other tray.
The Washington Monument cut will be engrained in your brain after this.

⬆ STEP 4 : CUTTING AND GLUING Make all your cuts and test fold all the turn-ins before you start the gluing process. Make any needed adjustments now because the next step is gluing. Cutting accuracy is critical. REPEAT these steps for the other tray.
Glue the book cloth, starting with the multiple small turn-ins at the 2 ends of the walls facing the spine. Follow with the “Washington Monument” tongues at the inside corner of each end of the fore-edge wall. Carefully consider what will show the most after each corner is finished. You want to “hide” problems. Glue, fold over, and tuck each end wall flap in place. Lastly, glue, fold over, and tuck the fore-edge flap.
We purchased small metal triangles that help maneuver in these tight corners if you can find them. Plastic ones work, but working in crowded spaces makes nicking the triangle’s edges easy.

⬆ STEP 4 (continued) : FINISHING THE WALLS In the photo above, all the turn-ins and flaps have been glued. The pointed tip of a bone folder has been used to ensure the cloth is pushed tightly into the creases where the walls meet the floor. Now that everything is glued, the tray has become amazingly rigid—perfect for protecting whatever goes inside.

⬆ STEP 5 : FINISHING THE FLOOR Measure and cut a piece of decorative paper (or more book cloth) to cover the floor. Trim the outer corners of the spine edge turn-in (visible at the bottom of the photo) to reduce excess material at the corners on the bottom of the tray. Do a test fit before gluing it in place, being careful to apply glue to the thin edge where the turn-in wraps under the floor.

⬆ Step 6 : STARTING THE COVER Above, front & back cover boards and a spine board have been cut to size and glued in place on a piece of book cloth. The length of the cover boards can be the same or slightly longer than the larger tray. The width of the two boards is usually slightly wider to give a lip that aids in opening the box. The spine board is cut to the same height as the cover boards. The gap between the spine board and cover boards is based on the thickness of the book board that is used.
All turn-ins and trim marks have been drawn on the book cloth to show where all the excess material should be removed.

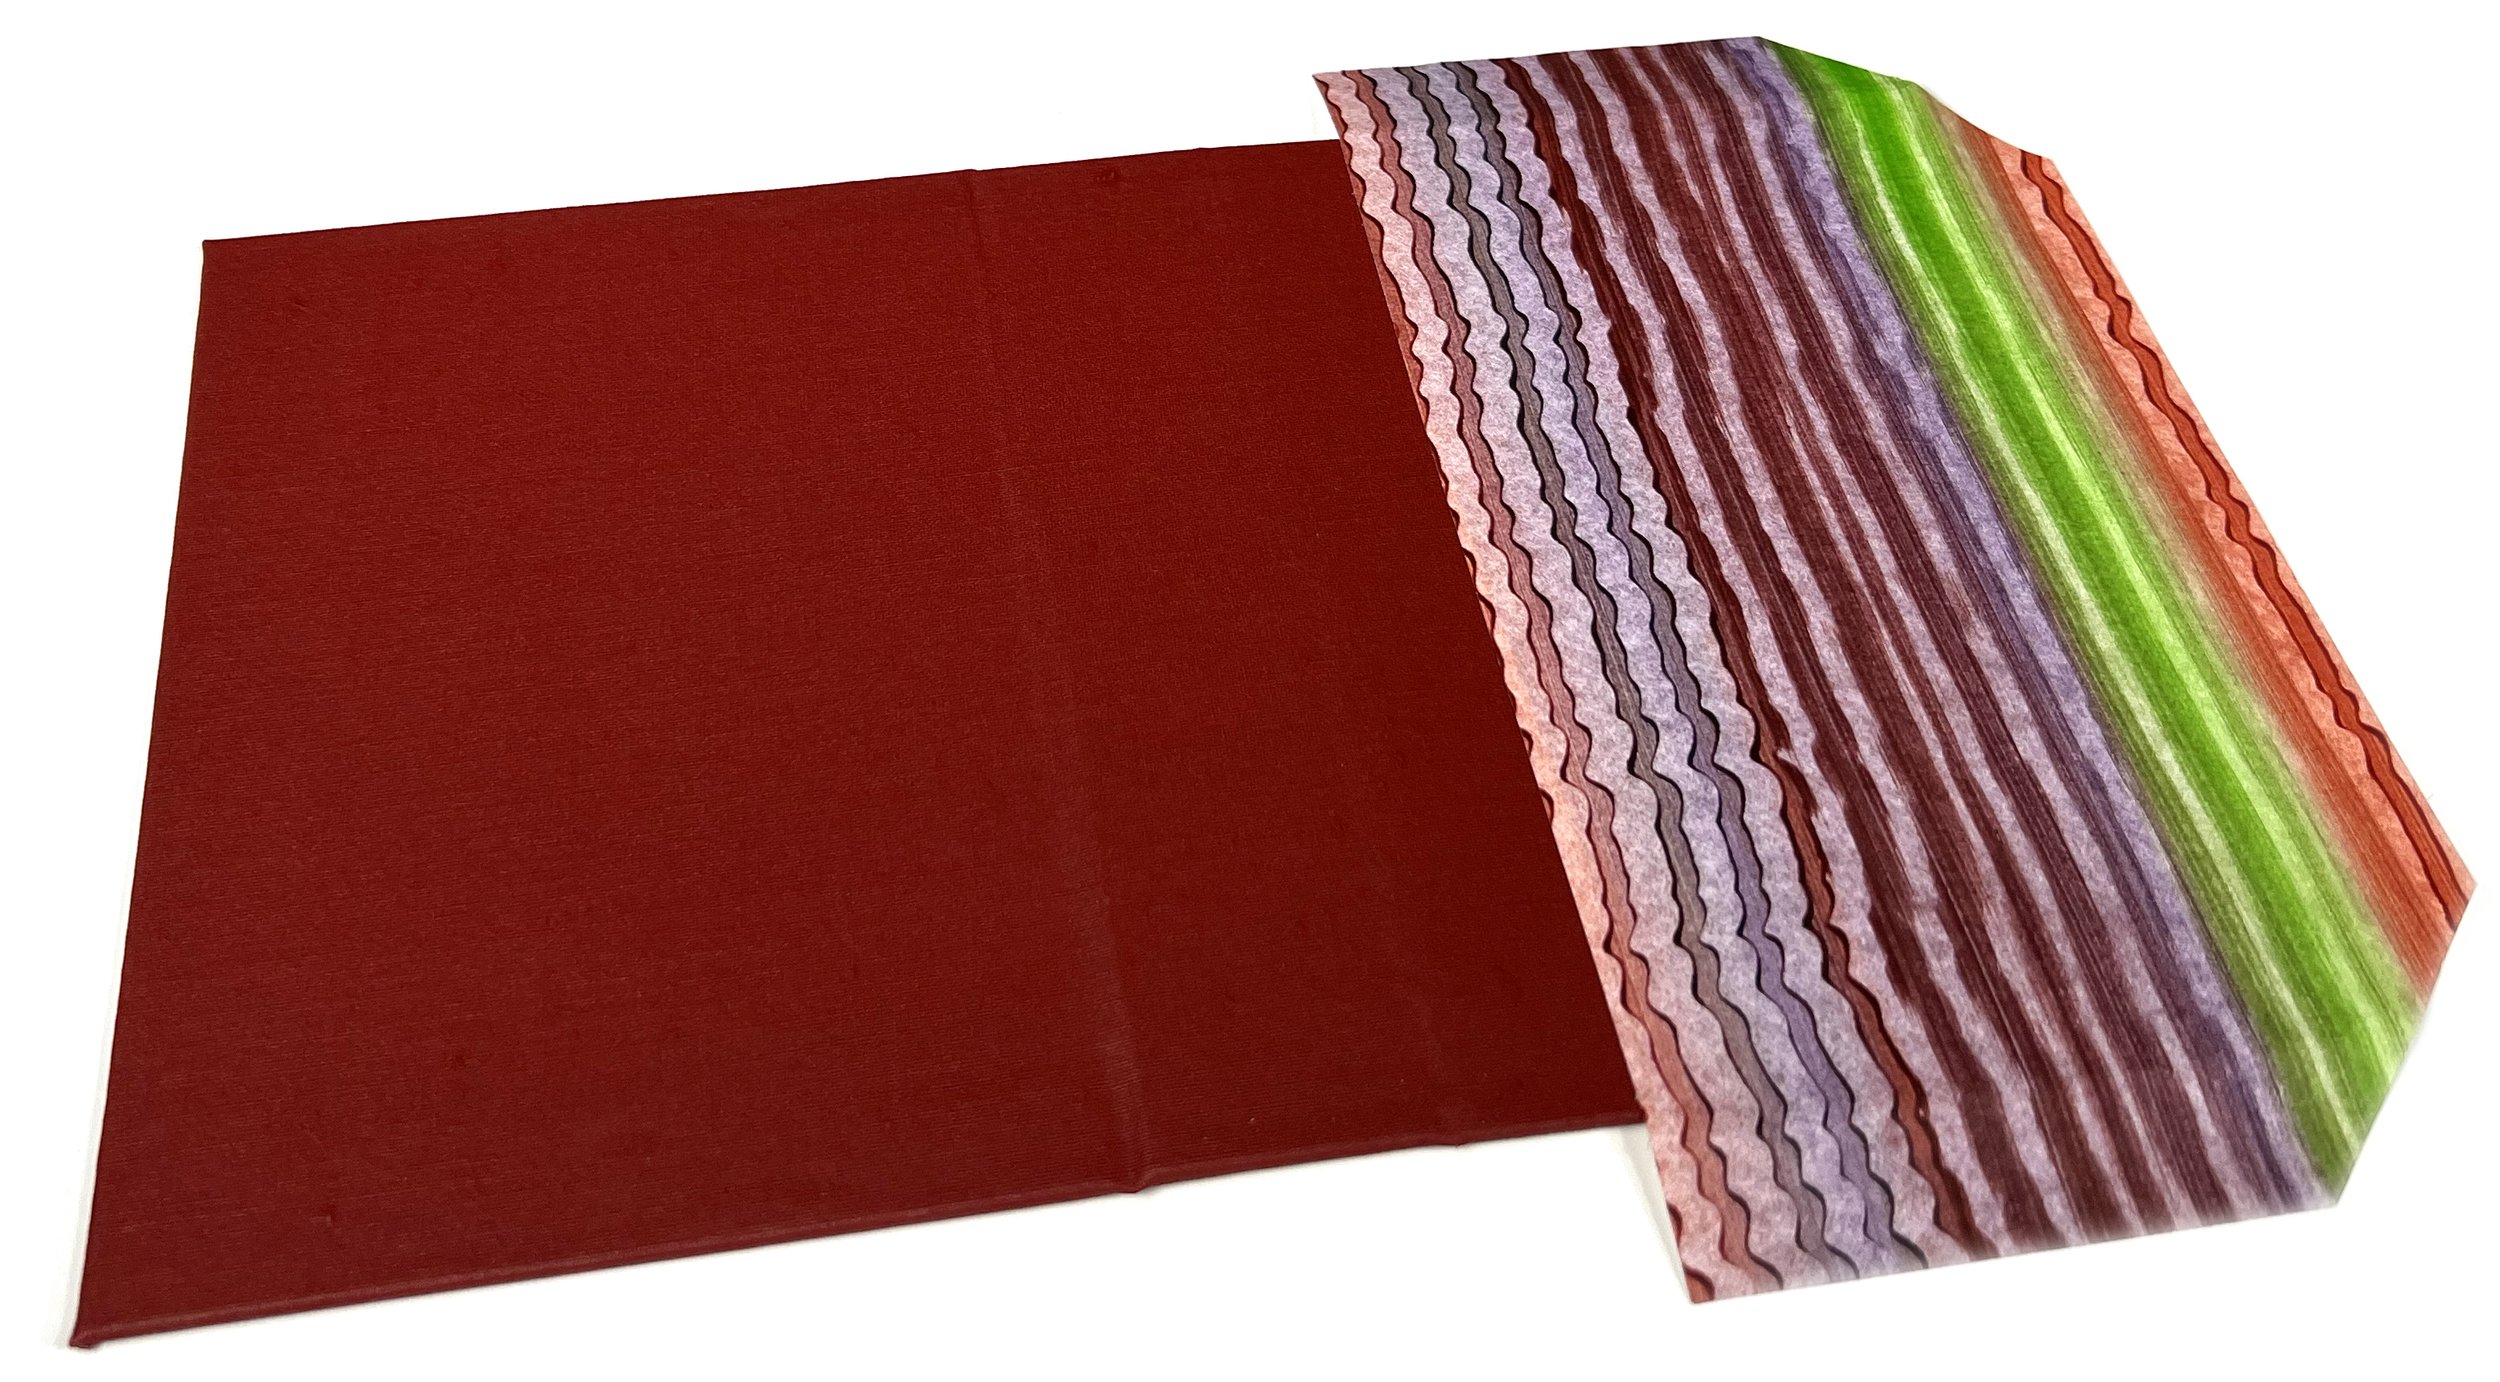
⬆ Step 6 (continued) : In the photo above, the initial cover assembly has been flipped over to show the outside of the front cover board, which is ready to accept the gluing of a different covering material—in this case, it is going to be a piece of colorful paste paper. The red book cloth laps over onto the front cover board 3/4” to ensure good adhesion. The paste paper will then slightly overlap the edge of the book cloth to prevent a frayed edge on the cloth.

⬆ STEP 7 : FINISHING DETAILS Here, the inside of the spine board has been covered with a matching book cloth. The paste paper has been glued in position and trimmed, ready for folding the turn-ins and gluing them to finish off all the outer edges of the cover. The image below shows the paste paper cover before the turn-ins are glued.

A few Lead Graffiti projects with clamshells

⬆Books, like family Bibles, are great reasons for a clamshell as they are often delicate. Several of these show a secondary box that held things that had been stuffed into the Bibles, both of which are held together with electrical tape.
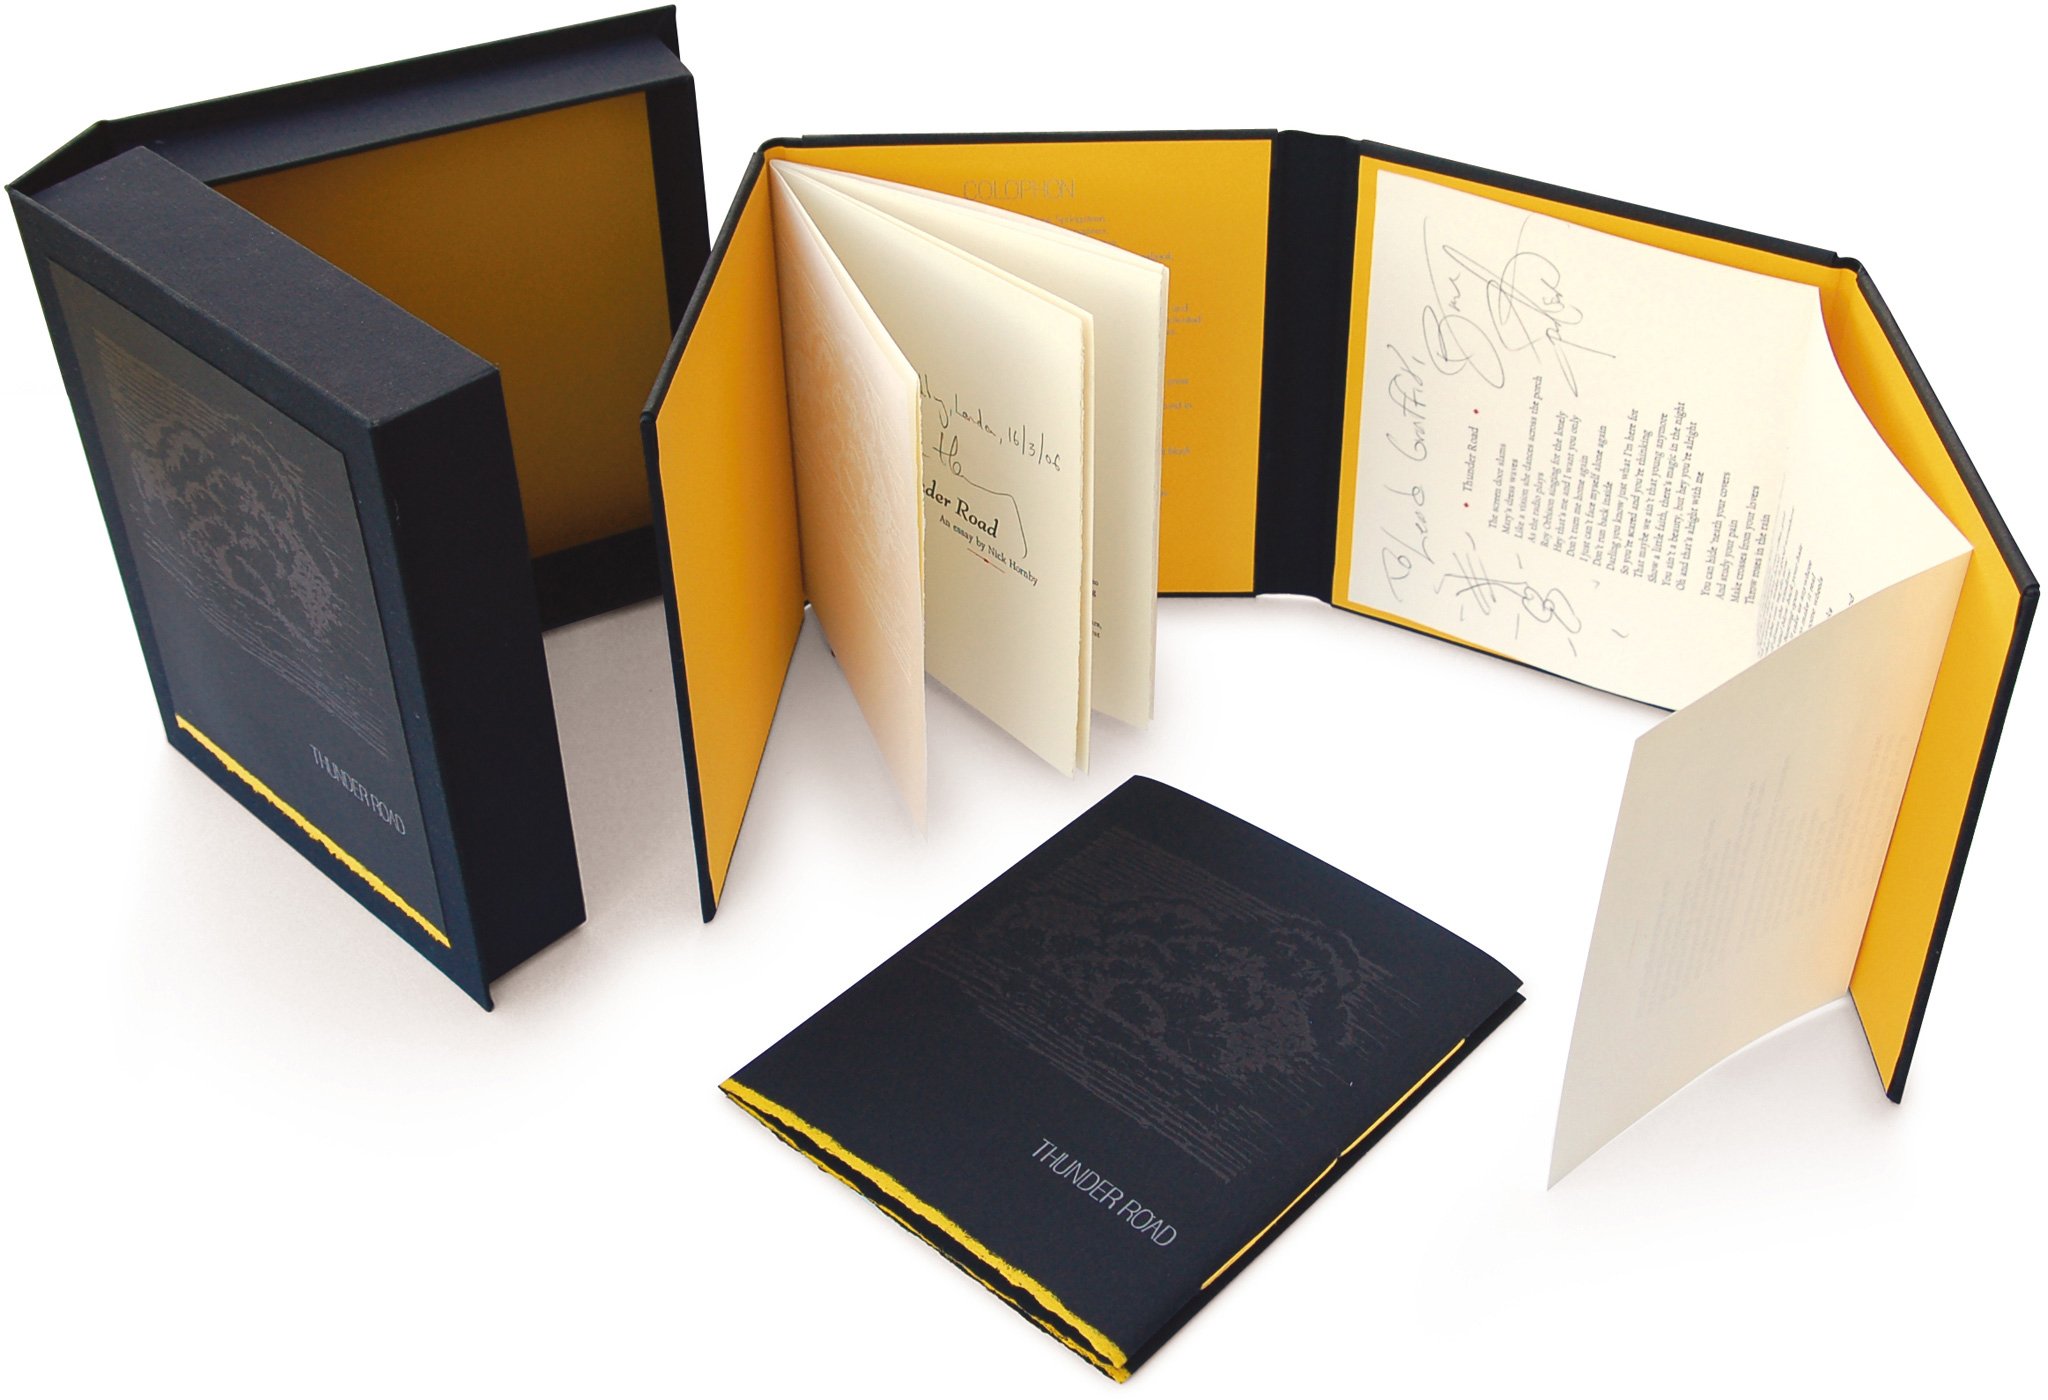
⬆This was one of the 6 presentation clamshell boxes that contained both the hardback and soft cover editions of British author Nick Hornby’s essay entitled “Thunder Road” and the lyrics to Bruce Springsteen’s iconic song of the same name. The books were sold to support the Treehouse School for autistic children in London.

⬆This linen-covered and lined clamshell holds an important book in our collection that has a fragile slipcase and dust jacket.

⬆Shown here is one of six presentation clamshells Lead Graffiti helped create for the Thunder Road fundraising benefit project. The box houses signed hard and soft cover versions of a book that combines the work of British author Bruce Hornby with the lyrics of Bruce Springsteen.

⬆Our Tour de Lead Graffiti deluxe sets of prints for 2013 are each presented in a clamshell box wrapped with our purpose-made paste paper. Check out our paste paper workshop, which is only half a day and wholly fun.

⬆Students in a printmaking group from Anne Arundel Community College acquired a grant to commission a set of 6 presentation clamshell boxes to house a cooperative portfolio of their work. Normally the paste paper would wrap the outer cover, but Lead Graffiti chose to wrap the tray side walls instead to emphasize all the print goodies housed inside.