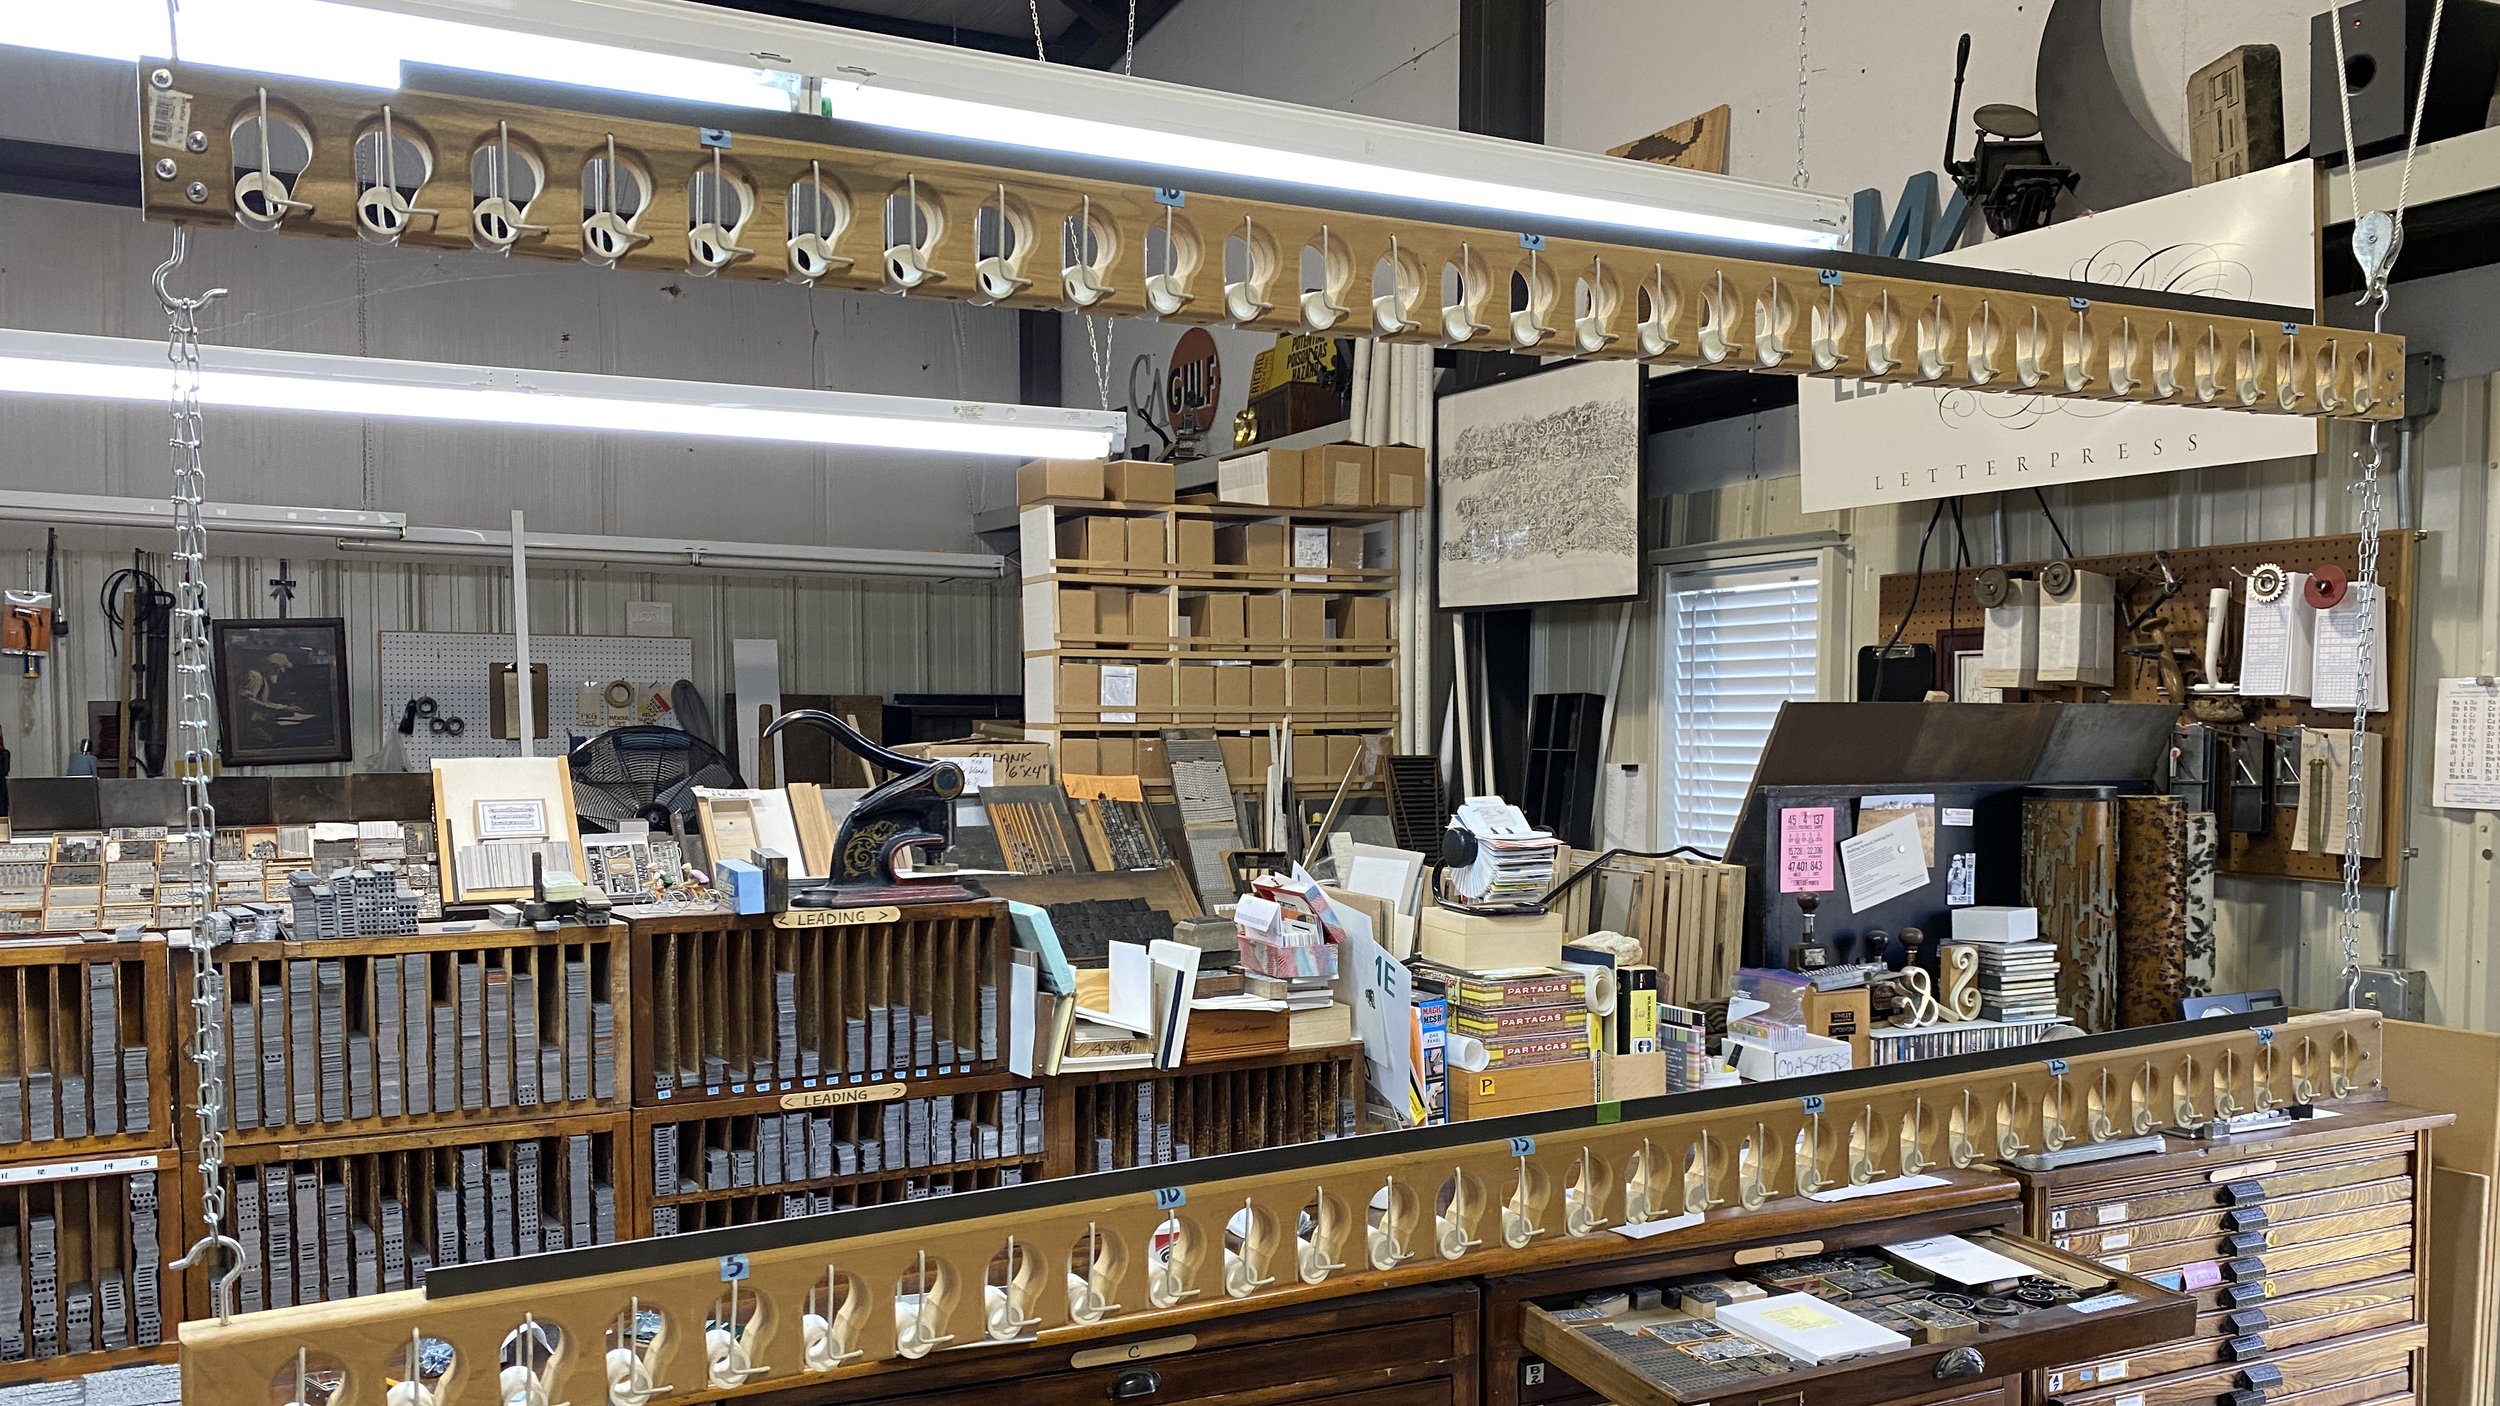
We thought some letterpress printers would be interested in the drying racks we have in Lead Graffiti. We use these specifically to hang larger prints with hand-rolled areas, or large areas with heavy ink coverage.
With our 22-foot studio ceiling, we can hang one rack below the other, using a pulley system to raise and lower them to a working height. And then we can raise them out of the way while fully loaded to dry. We can also connect two of them side-by-side to hang larger prints and to help them remain flat, especially with thinner stock that curls while hanging from a single point.
We initially saw the idea when visiting Alan Kitching at the Royal College of Art, London, UK. His letterpress studio racks used large glass marbles to hold the paper. We built our first rack by simply duplicating the British version. We loved the look of the marbles and wanted to maintain that feature at first.
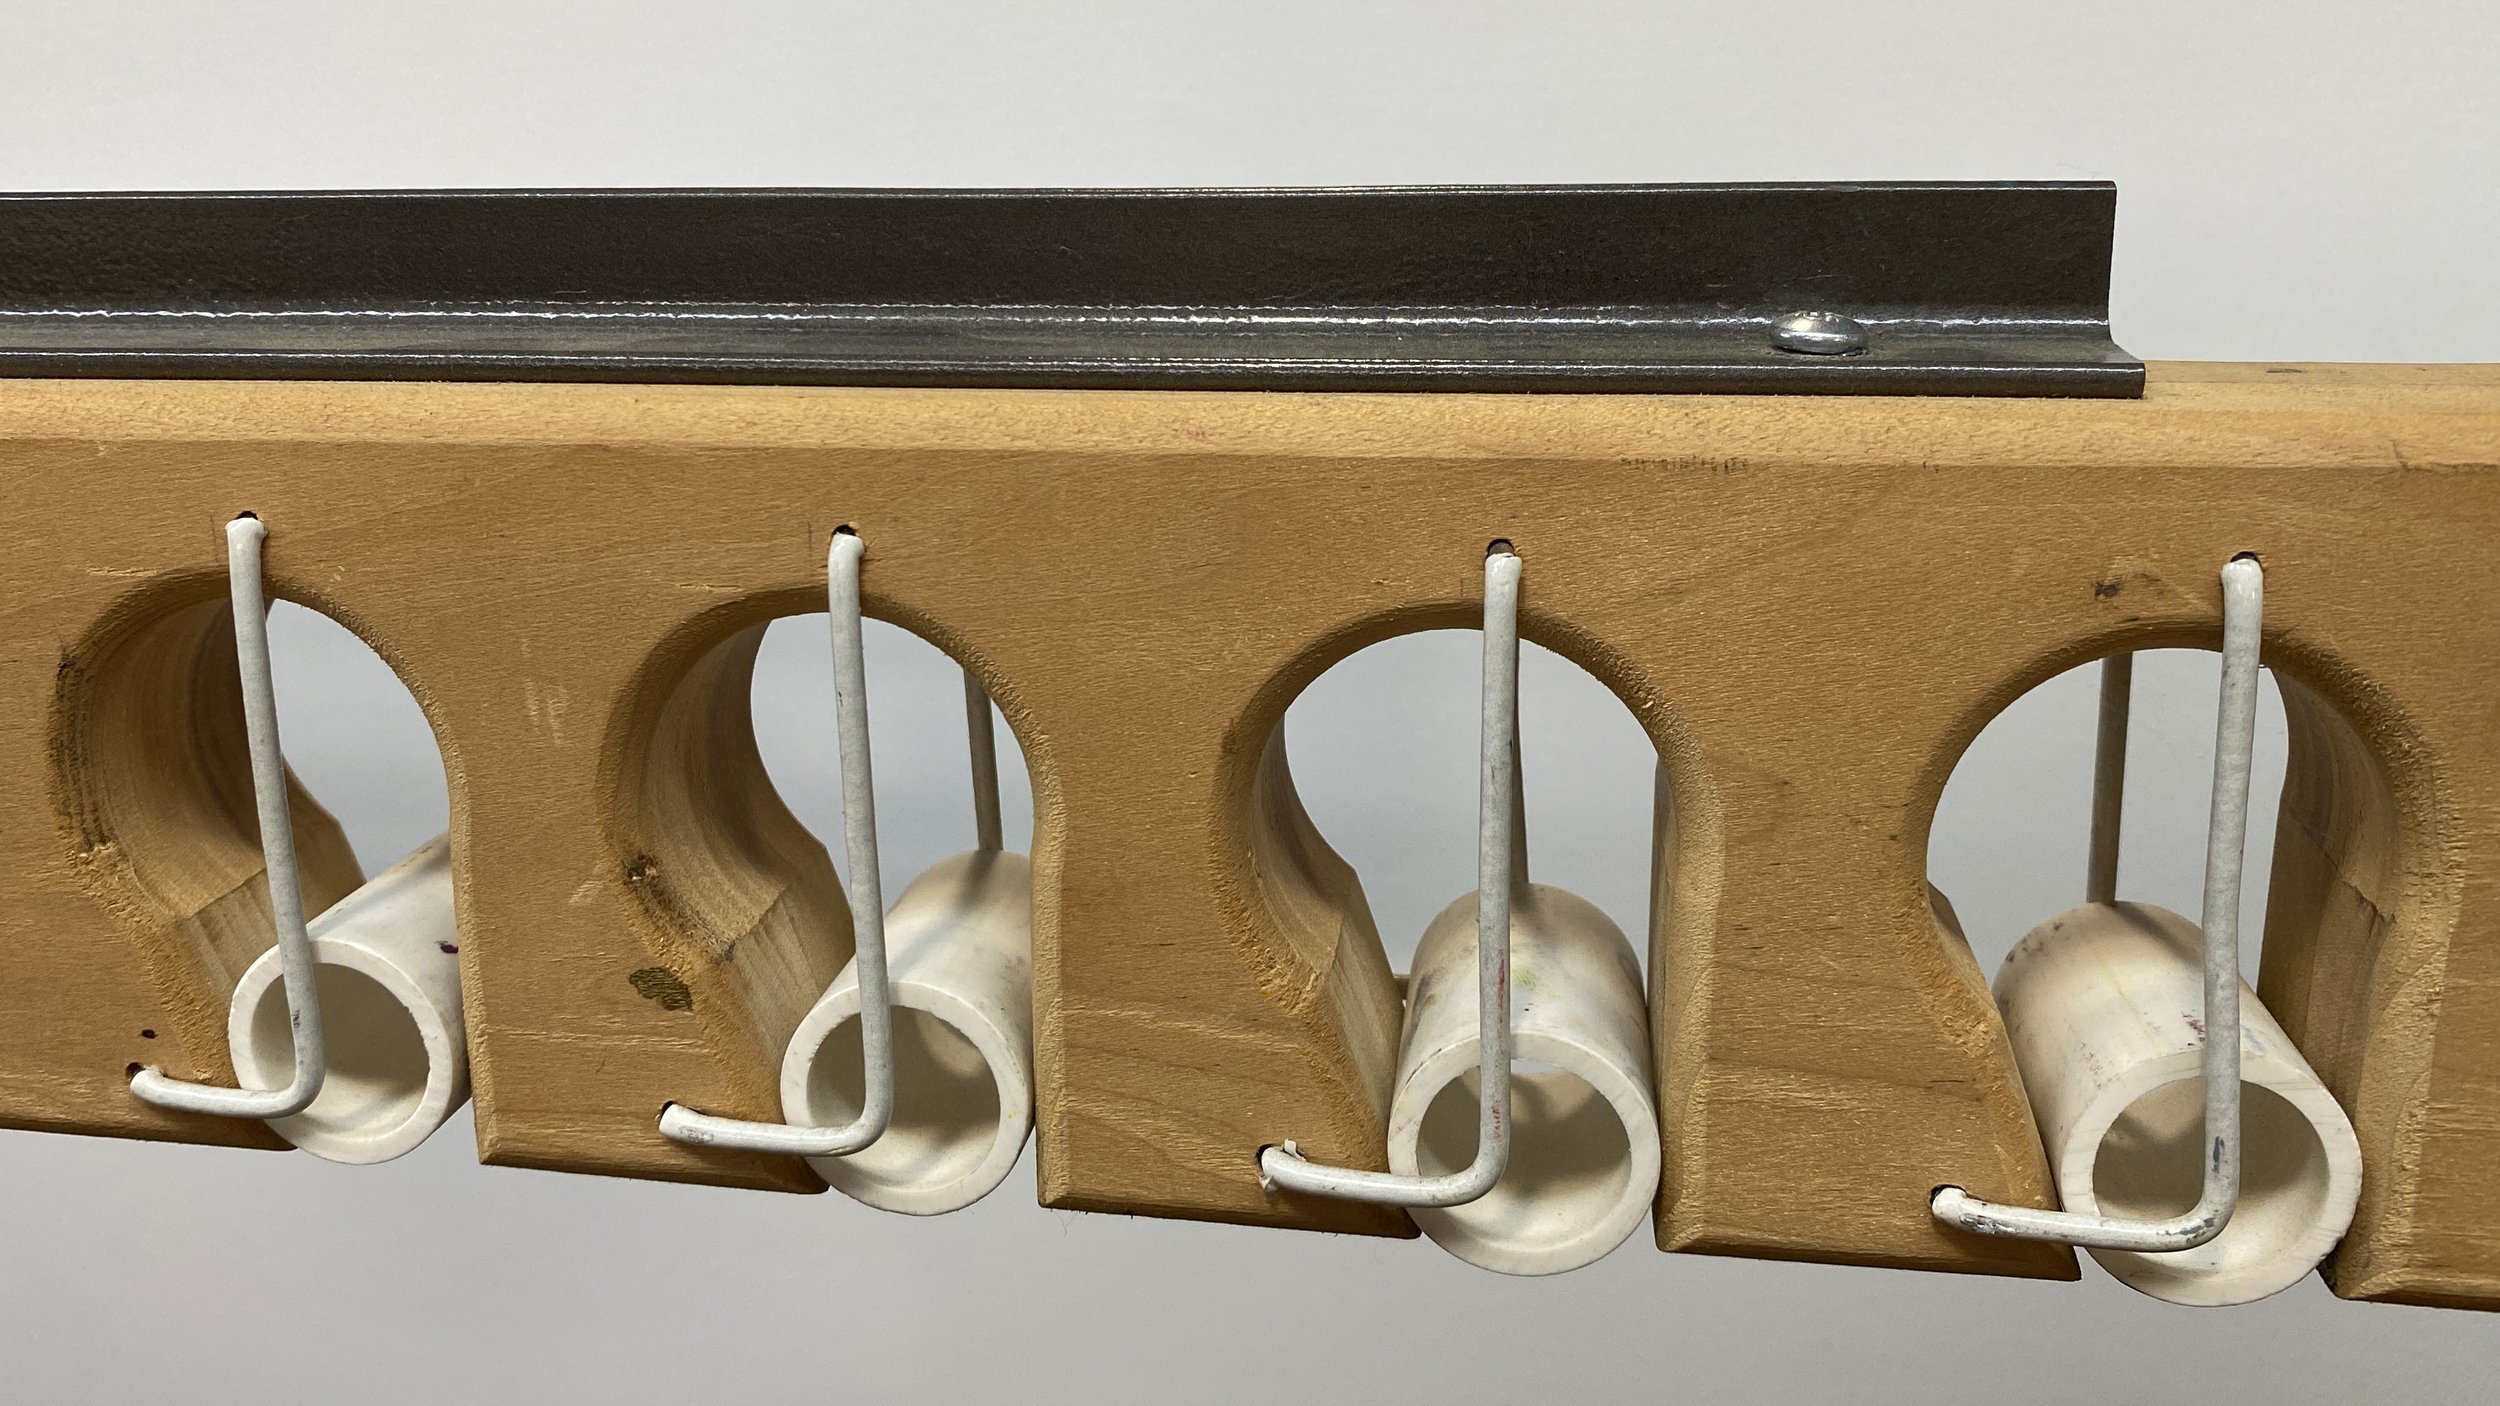
We drilled a 1.625” hole every 4.25”. We set up a jig to cut an accurate vertical edge to connect with that hole and then an angle cut that allows the PVC tube to hang slightly below the hole. The angle cut makes it easier to push up to release the print if necessary. You can usually remove a print on stiffer paper by simply pushing it up and pulling it out sideways.
Then we ran into the first major problem. We wanted a rather long rack (ours are 82”) where we could hang at least 60 wet broadsides back-to-back. Over the past 10 years or so, our major broadside sheet has been Somerset Textured 300gsm. The edition on many of our prints runs to about 40 or 50. When hanging that many large prints, the rack starts to sag in the middle. The problem : when taking prints off the rack, the sagging rack starts to slowly spring back into its original shape (i.e., flat). We noticed that the spring-back pressed the marbles into the soft paper, leaving a small round dimple. It took us a while to figure out what was causing it, as we typically didn’t examine the prints while we were taking them off. It might be worth considering attaching the eye hooks more toward the middle to help even out the impact of the weight of the prints.
Eventually, we settled on 1”-diameter PVC pipe from Home Depot. I sometimes wish they were a bit heavier and played with putting some sort of weight inside the PVC, which complicated the rolling motion of the pipe. Eventually, we just settled on plain PVC. The upshot is that the tube shape distributes the pressure across a wider area on the print, so the dimple issue is solved. The other half of the solution is the plain steel angle (also Home Depot) that is screwed along the top of the rack which prevents the wood from sagging as more prints are added.
The second problem was figuring out how to keep the PVC pipes in place. The British version used an uncoated wire to cage the marbles. The wire shape we settled on is pretty much what you see here. Finding a wire that was stiff enough was difficult. We finally located the metal wire shelving you see above. Using wire cutters, we would cut the longest segment and then cut that in half before bending. The wire was nicely coated with a plastic surface to keep it from rusting (Delaware has humid summers and our studio is not air-conditioned) and possibly creating problems if prints touched them when inserting / removing them.
After a couple of tries, we built a wire bending jig so the wires would fit the two holes we had drilled. Before inserting the wire, we would cut around the ends of the wire and remove the plastic covering so it wouldn’t ride up when inserting. We were careful to use a SLIGHTLY too small drill bit and hammered the wire in for a tight fit.
A large hook at each end of the rack and sturdy chain (like for a child’s swing) allow for hanging. A simple pulley system makes for easy overhead storage out of the way until it’s needed.
Above is an instance where we printed large prints on an iron hand press using text-weight paper. We nailed a board across 2 hanging racks to suspend each poster from 2 points.


